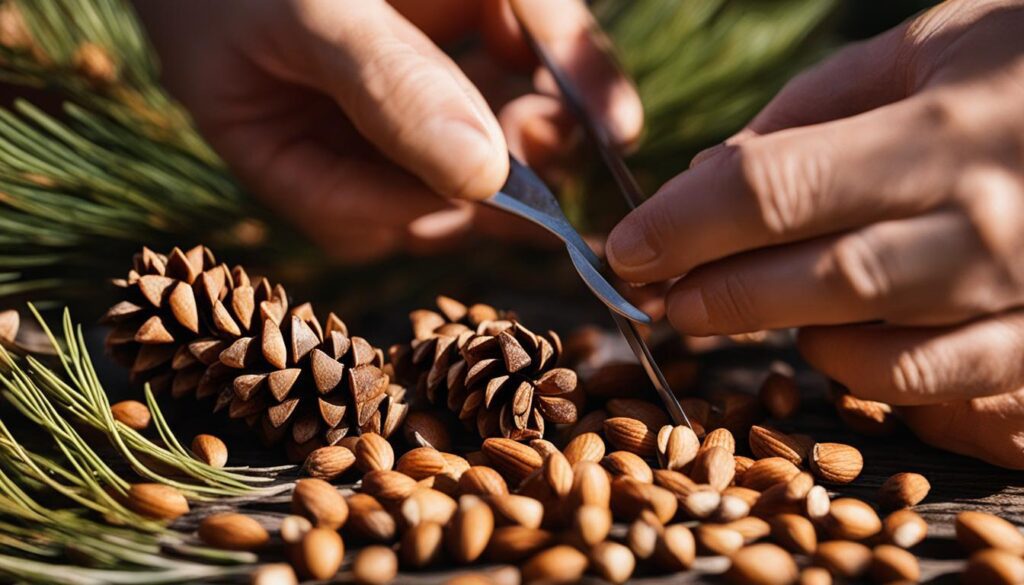
Welcome to my ultimate guide on how to remove pine nuts from pine cones. If you’ve ever wondered about the process of harvesting and processing pine cones to extract those delicious pine nuts, you’re in the right place. In this guide, I’ll take you through the step-by-step process, from choosing the right pine tree for harvesting to properly drying and extracting the pine nuts. So, let’s dive in and uncover the secrets of pine cone harvesting!
Harvesting pine nuts from pine cones is a time-consuming but rewarding process. It involves selecting the right pine tree, harvesting the cones at the right time, and properly drying them. By following the techniques and methods outlined in this guide, you’ll be able to successfully remove pine nuts from pine cones and enjoy their wonderful taste and nutritional benefits.
Choosing the Right Pine Tree for Harvesting
When it comes to harvesting pine nuts from pine cones, choosing the right pine tree is essential. Not all pine trees produce nuts that are large enough to be worth harvesting. If you want to ensure a better yield, consider selecting the Colorado pinyon, Mexican pinyon, or single-leaf pinyon trees.
These specific types of pine trees are known for their ability to produce large pine nuts. By focusing on these varieties, you can increase your chances of harvesting quality nuts that are worth your time and effort.
It’s worth noting that pine trees are the only trees that produce nuts large enough to be worth harvesting. So, if you’re looking to embark on a pine cone picking adventure, make sure you choose the right pine tree for the job.
Pine Cone Picking: Tips and Techniques
When it comes to harvesting pine cones from the chosen pine tree, timing is everything. It’s best to pick the pine cones before they open to prevent wild animals from raiding them for the nuts.
Look for pine cones that have a greenish color and distinct scales that have not yet opened up. To pick the cones, simply twist them until they separate from the branch. Place the cones in a container and continue picking until you have enough for your needs.
Once you have gathered the pine cones, it’s time to dry them. You can either dry them in the sun by placing them in a burlap bag or similar container for about 21 days, or you can roast them in an oven at 375°F until their scales open.
By following these techniques for pine cone picking and harvesting, you’ll be well on your way to obtaining the delicious pine nuts that lie within. In the next section, we will explore the process of extracting and storing the pine nuts, so stay tuned!
Harvesting and Drying the Pine Cones
When it comes to harvesting pine nuts from pine cones, timing is crucial. To ensure a successful harvest, it’s important to pick the pine cones before they open up. Look for cones that have a greenish color and distinct scales that are still closed. These cones are ripe for picking and contain mature pine nuts.
To harvest the pine cones, simply twist them gently until they separate from the branch. It’s best to use a container to collect the cones as you go, ensuring that none of the valuable nuts are lost. Continue picking until you have enough pine cones for your needs.
Once you have collected the pine cones, the next step is to dry them. There are two common methods for drying pine cones. The first method involves placing the cones in a burlap bag or similar container and leaving them out in the sun for about 21 days. This allows the cones to dry naturally, with the heat from the sun opening up the scales and releasing the nuts.
Alternatively, you can choose to roast the pine cones in an oven. Preheat your oven to 375°F and spread the cones out on a baking sheet. Roast them for about 15-20 minutes, or until the scales open up. Be sure to keep an eye on them to prevent burning. Once roasted, allow the cones to cool before proceeding to the next step.
How to Remove Pine Nuts from Pine Cones
Now that your pine cones are dry, it’s time to extract the pine nuts. Begin by wearing gloves to protect your hands from the resinous sap that can be present on the cones. Take each pine cone and remove the scales one by one, exposing the nuts underneath. As you remove the scales, you may find some nuts floating in a bowl of water. These are likely empty and can be discarded.
Once you have removed the scales, you will be left with the pine nuts. To remove the outer shell and skin, make a small divot with your nail and pinch the sides of the nut. Roll it between your fingers, applying gentle pressure, until the shell and outer skin rub off. Repeat this process for each nut until you have successfully extracted all the pine nuts.
To store the pine nuts, place them in an airtight container and keep them in the refrigerator if you plan to use them within a month. For long-term storage, it’s best to freeze them. Simply transfer the nuts to a freezer-safe bag or container and place them in the freezer. Properly stored pine nuts can remain fresh for up to a year.
Extracting and Storing the Pine Nuts
Once you have successfully harvested and dried your pine cones, it’s time to extract the precious pine nuts from them. To ensure a smooth extraction process, I recommend wearing gloves to protect your hands from the sticky sap. This will make the task more comfortable and hygienic.
To extract the pine nuts, start by removing the scales of the pine cones. You can do this by gently pulling them off one by one, revealing the nuts underneath. Be patient and thorough during this step to ensure you extract as many nuts as possible.
As you remove the scales, you may come across floating nuts in the bowl of water you’re using. These floating nuts are likely empty and won’t yield any edible pine nuts. Simply discard them and focus on the ones that sank to the bottom, as they are the viable ones.
Shelling the Pine Nuts
Once you have a bowl of pine nuts free from scales and empty shells, it’s time to shell them. Start by making a small divot in the nut’s outer shell using your nail or a small knife. This will help you get a grip and make the shelling process easier.
Next, pinch the sides of the nut and gently roll it between your thumb and finger. As you do this, you’ll notice that the shell and the outer skin rub off, revealing the creamy and delicious pine nut inside. Repeat this process for each nut until you have a pile of shelled pine nuts ready to be stored or used in your favorite recipes.
Storing the shelled pine nuts is easy. If you plan to use them within a month, store them in an airtight container in the refrigerator to maintain their freshness. However, if you want to store them for a longer period, it’s best to freeze them. Place the shelled pine nuts in a freezer-safe bag or container and store them in the freezer for up to several months. Freezing will help preserve their flavor and prevent them from going rancid.
With the pine nuts extracted and properly stored, you’re now ready to enjoy their delicious taste and incorporate them into your favorite dishes. From savory pesto to flavorful salads, pine nuts add a unique and nutty dimension to various recipes. Get creative in the kitchen and explore the versatility of these tiny treasures!
Conclusion
Harvesting pine nuts from pine cones can be a labor-intensive process, but it’s worth the effort for their delicious taste and nutritional benefits. By following the steps outlined in this guide, you can successfully remove pine nuts from pine cones and enjoy their versatility in various dishes.
Whether you’re roasting them for a snack or using them in recipes like pesto or salads, pine nuts can add a unique flavor and texture to your meals. The process of pine nut removal can be time-consuming, but it’s a rewarding experience that allows you to connect with nature and appreciate the food we consume.
Remember, selecting the right pine tree, harvesting the cones at the right time, and properly drying them are crucial steps in the process. From choosing the right tree to extracting and storing the nuts, each step plays a vital role in ensuring a successful harvest.
So, go out and start harvesting your own pine nuts! Explore different pine nut removal techniques and discover the method that works best for you. Enjoy the satisfaction of gathering your own food and adding a touch of nature’s bounty to your culinary creations.
FAQ
Are all pine trees suitable for harvesting pine nuts?
No, not all pine trees are suitable for harvesting pine nuts. The Colorado pinyon, Mexican pinyon, and single-leaf pinyon trees are known for producing large pine nuts and are the preferred choices for harvesting.
When should I harvest the pine cones?
It is best to harvest the pine cones before they open to prevent wild animals from taking the nuts. Look for greenish pine cones with distinct scales that have not yet opened up.
How do I pick the pine cones off the tree?
Twist the pine cones until they separate from the branch. Place the pine cones in a container and continue picking until you have enough.
How do I dry the pine cones?
You can dry the pine cones in a burlap bag or similar container in the sun for about 21 days. Alternatively, you can roast the pine cones in an oven at 375°F until their scales open.
How do I extract the pine nuts from the dried or roasted pine cones?
Wear gloves to protect your hands from sap. Remove the pine cone scales to expose the nuts and discard any floating nuts in a bowl of water as they are most likely empty. Shell the nuts by making a divot with your nail, then pinch the sides and roll them until the shell and outer skin rub off.
How should I store the shelled pine nuts?
If you plan to use the pine nuts within a month, store them in the refrigerator. For long-term storage, freeze the shelled pine nuts.
Why is harvesting pine nuts from pine cones worth the effort?
Harvesting pine nuts from pine cones can be labor-intensive, but the delicious taste and nutritional benefits make it worth the effort. Pine nuts can add a unique flavor and texture to various dishes, such as pesto or salads.
Can I use pine nuts as a snack or in recipes?
Absolutely! Pine nuts can be roasted for a snack or used in a variety of recipes, adding a delicious flavor and texture to your meals.


